Personal Learning Record (PLR) Download
Maytas can be configured to connect to the PLR service to download a learner's personal learning record. A licence must be purchased to use the PLR download in Maytas - please contact your account manager for more details.
Setup PLR
Obtain PLR Service Certificate
First, a certificate must be obtained from the ESFA for the PLR service. To do this, the Live Web Service Connection Form from here must be completed and sent to the LRS Business Support Team (details are at the top of the document). Please ensure that you tick the Get Learner Learning Events (PLR) option under section 3 on page 2.
Install Certificate
These instructions should be performed on the server where Maytas 5 Server Manager runs.
Once you have obtained a certificate, it must be installed:
- Go to Start, enter mmc.exe in the search bar and press enter.
- Go to File | Add/Remove Snap-in.
- Select Certificates on the left and click Add.
- Select Computer account and click Next.
-
Select Local computer and click Finish.
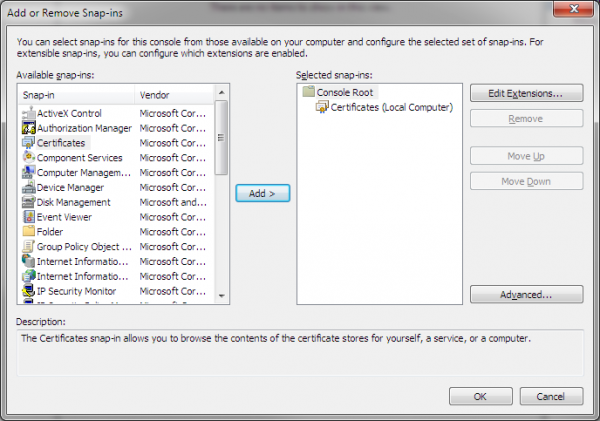
- Click OK.
- Expand the folder tree, select Trusted Publishers, then right-click it and select All Tasks | Import.
- Click Next, then click Browse.
- Open the dropdown box at the bottom-right and select Personal Information Exchange (*.pfx,*.p12).
- Browse to and select your certificate and click Open.
- Click Next.
- Enter the password for the certificate and click Next.
- Click Next, then click Finish. Click OK on the message that appears.
The certificate must also be installed for the user account as well as the local computer:
- In the Management Console, go to File | Add/Remove Snap-in.
- Select Certificates on the left and click Add.
- Select My user account and click Finish (please note that the wording may be My current user or similar depending on your version of Windows).
- Click OK.
- Expand Certificates - Current User on the left.
- Select Personal, then right-click it and select All Tasks | Import.
- Click Next, then click Browse.
- Open the dropdown box at the bottom-right and select Personal Information Exchange (*.pfx,*.p12).
- Browse to and select your certificate and click Open.
- Click Next.
- Enter the password for the certificate and click Next.
- Click Next, then click Finish. Click OK on the message that appears.
Configure certificate with web service
-
Open Internet Explorer and browse to the following URL:
https://ws.lrs.education.gov.uk/MIAPWebService/services/LearnerService
- Click OK to any pop-up windows that appear.
- You should see a certificate error. Click the option to continue (it will say this is not recommended - this is expected).
- Click OK to any further pop-up windows.
- Next to the address bar you should see a box which says Certificate Error. Click this and select View Certificates.
- Click Install Certificate.
- Click Next and select Place all certificates in the following store.
- Click Browse and tick the Show physical stores checkbox.
- Expand Trusted Root Certification Authorities.
-
If you are using Windows Server 2008 R2 or earlier, select Local computer.
If you are using Windows Server 2012 or later, select Registry.
- Click OK.
- Click Next.
- Click Finish.
- Click Yes to continue on the warning message, then click OK.
- Click OK to close the Certificate window.
Configure Settings in Maytas
Find certificate details
- Open the Management Console (go to Start, enter mmc.exe in the search bar and press enter).
- Expand Certificates (Local Computer) | Trusted Publishers and select Certificates.
- You should see the certificate on the right. Make note of the values in Issued To and Friendly Name, as these will be required in the Maytas config settings.
Enter Config Settings
A number of the required config values can be found in your email from the LRS Business Support Desk containing the service details. Please have these details ready before continuing. If you are unsure of what to enter for any of the values, please contact Maytas Support.
- Start Maytas, click the Maytas logo at the top-left and select Options.
- Under the Maytas 5 heading on the left, select LRS Tools.
- Scroll down to the PLR section. Tick each box and enter the following details:
LRS service Url for PLR download - this should be
- LRS Service URL - https://ws.lrs.education.gov.uk/MIAPWebService/services/LearnerService
- Changes the UKPRN that Maytas uses for the LRS connection - This should be the UKPRN value from the LRS email.
- Vendor ID - This should be 3.
- LRS Username for PLR download - This should be the Username value from the LRS email.
- Certificate subject name for PLR download - This is the Issued To value for the certificate (see the above section for details on finding this).
- Certificate friendly name for PLR download - This is the Friendly Name value for the certificate (see section above).
- Password for PLR download - This should be the Organisation password, which should be sent to you by the LRS Businses Support Desk.
- Organisation reference for PLR download - This should be the Organisation value from the LRS email.
- Click OK when finished.
Using the PLR
Download PLR Data
- In Maytas, open a learner record.
- Click LRS Tools on the ribbon and select Download PLR.
-
A window will appear:
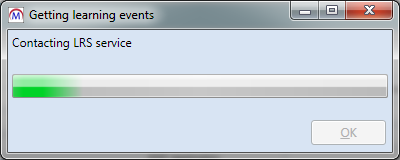
When it has finished contacting the service, it will return a message indicating whether it was successful or whether there were errors (e.g. if it cannot match the learner). Learners are matched on six fields:
- ULN
- Given Name
- Family Name
- Date of Birth
- Gender
- Postcode
- Click OK to close the message.
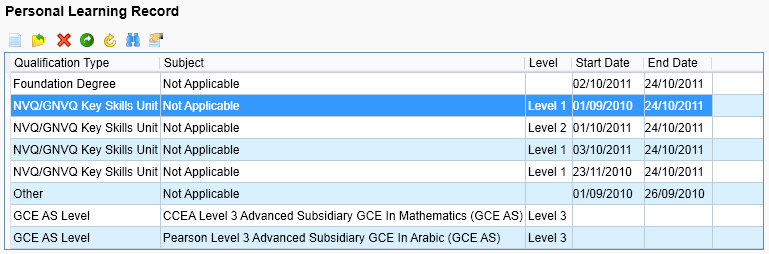
View PLR Data
Once a learner's PLR data has been downloaded, it can be viewed by going to the Personal Learning Record tab. To view full details of a row, select the row and click the  button.